Colour-Changing Brush in Affinity

Affinity Designer is a great tool for creating vector lettering. I use it frequently when building hand lettering compositions that will have to change size dramatically. But Affinity can also be used for raster-based lettering. And that’s what we’re working with today.
This trick isn’t really magic… it’s just a setting I found that creates a neat effect. But it will definitely impress all your friends and add some pizzazz to your lettering projects so let’s get to it.
You need to have Affinity Designer open and make sure you’re in the Pixel persona (because this effect only works with raster brushes).

You also want to have the brush tool selected.

On the right-hand side, select the brush customisation drop-down and add a category (because you’re going to be making your own brush).

Then select the brush customisation drop-down again and choose “new round brush.”

Don’t worry about any info on the top customisation page - instead, tap into “Dynamics.”

Find the “Hue” slider (on the left) and adjust it up to 100%. “Hue” in the brushes setting affects the brush colour - determining which parts of the spectrum appear when you draw a line.

On the Hue dropdown, choose “Velocity.” This will tie the colour-change to the speed of your brush.

Tap “OK” to get back to the main screen.
On the colour selector, choose a bright colour. This trick doesn’t work with black and white. (I chose a bright red for this tutorial.)

Practice by drawing a few lines. The velocity (ie: speed) at which you move the pen determines the colour of the line.

If you go back into the brush dynamics panel (tap “more” on the bottom toolbar while you have the brush active) and move the Hue adjustment slider down to 50%, you’ll see that part of the spectrum is missing, and the colour-change is different than when the Hue setting is at 100%.

If you change the base colour, your line will display a different arrangement of colours. (In my example I changed the base from red to purple.)

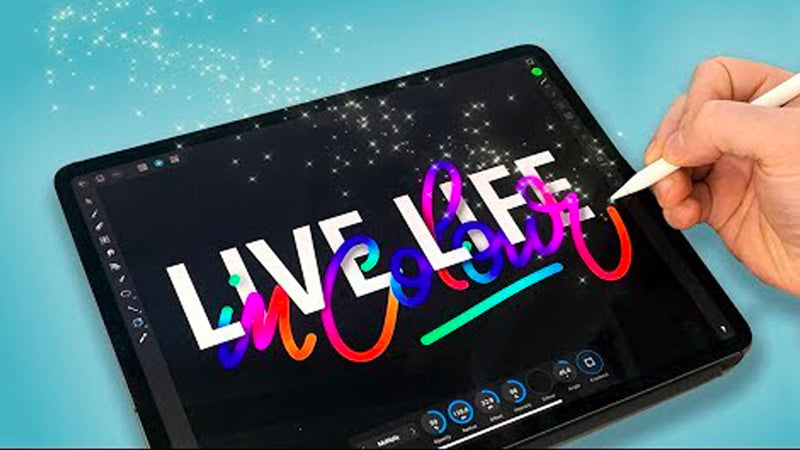
Once you’ve got the mechanics of this tool worked out, you can use it to create some stunning lettering effects.
In my example, I created two layers of white text that read “live life.” Half the letters are on the top layer, then there’s a blank middle layer, and then the full text sits on the bottom layer. (The image below is of the isolated top layer, with only a few letters visible.)

The middle layer is where I write “in colour” using the colour-changing brush. The effect is intertwined letters, with the colour-changing letters appearing to move in and out of the block text.

To add even more dimension to this piece I added an outer shadow to the top layer of text using the effects panel on the sidebar.

I also adjusted some of the levels in the adjustment panel on the bottom of the main screen (opacity, radius, offset, intensity) to really make those letters pop.

This is a simple adjustment to a custom brush in Affinity Designer and the effects are quite striking. There are lots of applications for this kind of effect and I hope you’ll experiment a bit to come up with something great.
Video Tutorial:
I can’t wait to see what you create. Make sure to tag me on Instagram @ianbarnard with your own versions of this “magical” colour effect brush in Affinity Designer.
1 Response
Leave a comment
Comments will be approved before showing up.


Mark de Muze
April 17, 2020
Great tutorial Ian and I think this can be adapted to other tools that work with a drawing tablet as well!
I’ll give this a go in my preferred software and share a post to the tutorial when ready.
Stay creative and safe.
Mark